Transporter Station
| Transporter Station |
|---|

|
The transporter station operates the matter transportation equipment of a spacecraft or building. The operator uses the transporter station to select locations and to activate the transporter in send or receive mode.
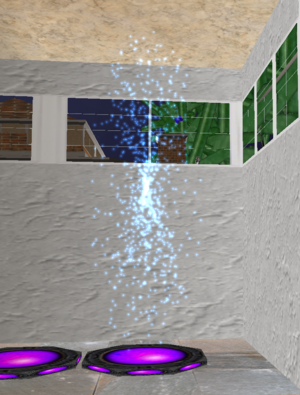
When activated, the transporter creates a one-way portal between the transporter pads and another location. The portal that is created exists until it is entered or until it decays after about fifteen seconds. The entry portal is bright blue with particles converging toward the center. The exit portal is bright red with particles emerging from the center. When no more portals remain, the transporter is deactivated and shuts off automatically.
The transporter station's primary display is very similar to the sensor station. Refer to the Sensor_Station page for a key to the information displayed. Display rotation and magnification is controlled using green and pink controls at the bottom right, similar to the sensor station. Declutter switches appear in a column at the right and function just like those on the sensor station.
Controls are activated by clicking on the console using the hand cursor. Controls also have corresponding keyboard equivalents. Help about using the hand cursor and a table showing the key commands for this station can be found on the Controls#Transporter_Station page.
Activation
 |
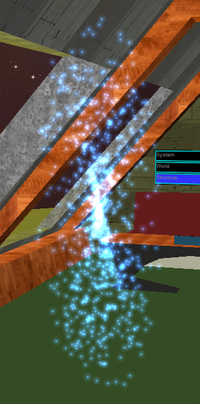 |
One portal will be created for each pad that is activated. The number of transporter pads to activate is controlled at the bottom left of the display. The maximum number that can be activated is based on the number of functioning pads associated with the transporter station. No portals are created if the target location is beyond transporter range.
The transporter is activated in send or receive mode. When sending, entry portals are created on pads in the transporter room and exit portals are created at the target location. When receiving, entry portals are created at the target location and exit portals are created on pads in the transporter room.
The transporter is activated using buttons at the bottom center of the display. The button with blue arrows pointing inward activates the transporter in send mode. The button with red arrows pointing outward activates the transporter in receive mode. Transporter power turns on when it is activated; transporter power does not have to be on prior to activating the transporter.
After the transport cycle is complete, transporter power is automatically turned off. The transporter console has a power switch at the top left corner. Turning on the power to the transporter system is only necessary when requesting a transporter-to-transporter beam-over from another spacecraft. Refer to the Transporter Protocol section below for more information. While the power is on and the transporter is inactive, the transporter room can be selected as a target for transport by any other transporter in range, even when your shields are up. Think of it as opening your door for anyone to enter.
Mode
The transporter offers three different modes for selecting a target location. At the left side below the power indicator light is a column of three buttons for choosing the target selection mode.
| Button | Name | Description |
|---|---|---|

|
Map Mode | Transporter's target is a longitude/latitude location on a map of a planet. |

|
Transporter Mode | Transporter's target is another transporter system. |

|
Sensor Mode | Transporter's target is an object detected by sensors. |
Map Mode
Map mode is used to select a longitude/latitude location on a map of a planet as the transporter's target location.
In map mode, the display shows a map projection of a planet. The spacecraft must be near a planet to use map mode. Pink areas on the map show relative city density. The position of the spacecraft is displayed as a small cross-shaped blip that alternates between black and white.
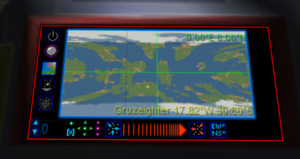
The transporter's target is the map location aligned with the crosshair at the center of the display. Map locations are selected by panning the display or by clicking a map location using the hand cursor. The transporter will not activate if the location is beyond transporter range.
The rosette of green arrows is used to pan the map display. The center green button restores the default pan location, centered on the planet map.
The pink arrows are used to increase and decrease the map display magnification. The center pink button restores the default magnification, which fills the display with the map of the planet.
Transporter Mode
Transporter mode is used to select another transporter as the transporter's target location. Transporters can be selected even when the shields of the target vessel are up.
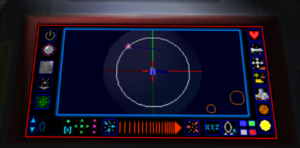
In transporter mode, the display shows a sensor scan display. The only blips that will appear are spacecraft with a transporter that is powered on and inactive. An active transporter cannot be selected as a transport target.
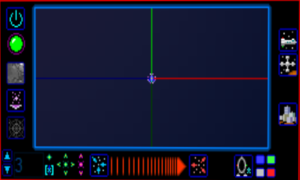
The number of portals created is limited by the transporter with the fewest pads. The example transporter is configured to activate three pads. If the destination transporter only had two pads, only two portals would be created.
Sensor Mode
Sensor mode is used to select buildings, spacecraft or personnel as the transporter's target locations.
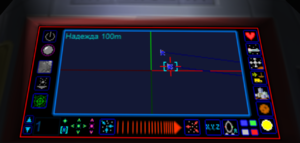
In sensor mode, the only blips that appear are those that can be selected as the transporter's targets.
Attempts to target spacecraft with their shields up will not be shown on the display since their hulls are impervious to transporter beams.
The red heart button is used to toggle the display of life forms, for decluttering the display. This declutter option is not available at the sensor station because the sensor station does not show life forms.
When a spacecraft is selected as the transport target, the portals appear at a randomly selected void location within the hull. Portals that are blocked by equipment or hull walls are not created.
When a person is selected as the transport target, the portals appear near their location, usually within twenty feet. The selected person can be aboard a spacecraft or on a planet's surface. Personnel floating in space cannot be transported.
Transporter Protocol
Safe and secure transporter operation dictates a certain usage protocol. Transporter protocol insures secure transport between vessels with their shields up. Transporter protocol also enables personnel to safely beam down to the surface of a planet, leaving their ship unattended in orbit with shields up and doors locked.
The following scenarios illustrate transporter usage protocol. All spacecraft in these examples have shields up, to prevent transporter intrusion, and hull doors closed and locked, for physical security. In all cases, the spacecraft involved remain secure after the transporter is used.
| Protocol | Steps |
|---|---|
| Beam Down to Planet from Spacecraft |
|
| Beam Up to Your Spacecraft from Planet | |
| Beam Up to Station from Planet | |
| Beam Over to Station from Spacecraft | |
| Beam Over to Your Spacecraft from Spacecraft | |
| Beam Over to Manned Spacecraft from Spacecraft |
|
| Beam Up to Manned Spacecraft from Planet |
|