Design Parts
| This section is in need of revision. Please help improve it or discuss these issues on the talk page. The reason given is: List needs to be separated depending on which design types can use them. |
Designs are made up of parts. Here is a comprehensive list of all of the parts that can comprise a design.
Some parts are only available depending on if it is a building design, spacecraft design, or other.
Barrier
Berth, Capt
Berth, Crew
Berth, Officer
Berth, Passenger
Berth, Troop
Build Zone
Camera
Console, Command
Console, Engineer
Console, Fire Control
Console, Helm
Console, Medic
Console, Power Relay
Console, Sensor
Console, Shield
Console, Transporter
Contrail Emitter
Decal

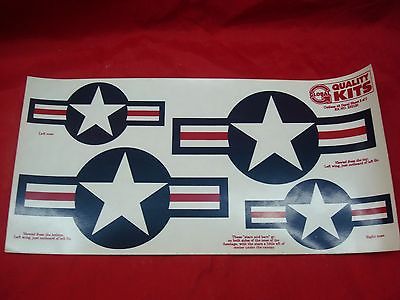
Decal parts are intended to simulate the decals applied to plastic models. They typically arrive on a sheet. A decal's faces are textured like the faces of any other part. When rendered, faces of decals are blended onto the faces of underlying geometry. OpenGL is configured to enable decals to exist in the same plane as other surfaces, without getting culled or causing unwanted surface collisions.
Decals should generally be placed where they conform to an existing surface, though this is not strictly necessary if a desirable visual effect is achieved by using them otherwise.
Decal, Berth Name
A berth name decal is a rectangle for displaying the name of the person assigned to a berth. When the associated berth is not assigned, the berth name decal shows Unassigned.
The name decal is created by entering two corner points of a rectangle. The name decal is oriented to the grid, with +X going to the right and +Y going up on the name decal. After creating a berth name decal, it should be associated with a berth, to show the assignee's name.
Steps:
- A corner point of the name decal is entered.
- The opposite corner point of the name decal is entered.
Key Commands:
Crestarts the action at the beginning.
Decal, Capt Name
A name decal is a rectangle for displaying the name of the captain of the spacecraft.
The name decal is created by entering two corner points of a rectangle. The name decal is oriented to the grid, with +X going to the right and +Y going up on the name decal.
Steps:
- A corner point of the name decal is entered.
- The opposite corner point of the name decal is entered.
Key Commands:
Crestarts the action at the beginning.
Decal, Empire Flag

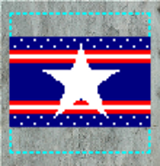
A flag decal is a rectangle for displaying the flag of the empire.
The flag is created by entering two corner points of a rectangle. The flag is oriented to the grid, with +X going to the right and +Y going up on the flag.
The flag rectangle should be square or nearly square in aspect ratio. It should have faces behind it. The flag that gets displayed in the area may not be square in shape. The flag's aspect ratio will be preserved, exposing faces behind the flag, or visible through holes in the flag.
Steps:
- A corner point of the flag is entered.
- The opposite corner point of the flag is entered.
Key Commands:
Crestarts the action at the beginning.
Decal, Empire Name

A name decal is a rectangle for displaying the name of the empire.
The name decal is created by entering two corner points of a rectangle. The name decal is oriented to the grid, with +X going to the right and +Y going up on the name decal.
Steps:
- A corner point of the name decal is entered.
- The opposite corner point of the name decal is entered.
Key Commands:
Crestarts the action at the beginning.
Decal, Ship Name

A name decal is a rectangle for displaying the name of the spacecraft.
The name decal is created by entering two corner points of a rectangle. The name decal is oriented to the grid, with +X going to the right and +Y going up on the name decal.
Steps:
- A corner point of the name decal is entered.
- The opposite corner point of the name decal is entered.
Key Commands:
Crestarts the action at the beginning.
Door
Fence
Game Table
Hull
Jig, Cutting
Jig, Decal
Jig, Door
Jig, Launch Tube
Jig, Window
Landing Gear
Lift
Light Bulb
Light Lens
Mesh
Panel, Capacitor
Panel, FTL Drive
Panel, Life Support
Panel, Maneuver Drive
Panel, Power Plant
Panel, Sensor
Panel, Shield
Panel, Weapon
Parking Spot, Ground Vehicle
Parking Spot, Spacecraft
Parking Spot, Space Rocket
Parking Spot, Space Vehicle
Parking Spot, Water Vehicle
Path, Ladder
Path, Walk
Pod Bay
Post, Citizen
Post, Livestock
Post, Troop
Room
Rotating Beacon Lens
Shrub
Site
Sketch
Space Vehicle Landing System
Space Vehicle Launcher
Station, Command
Station, Designer
Station, Engineer
Station, Fire Control
Station, Helm
Station, Medic
Station, Power Relay
Station, Sensor
Station, Shield
Station, Transporter
Status, Alert
Status, Life Support
Status, Mission
Status, World Map
Strobe Lens
Tree
Turret
Void, Environment
Void, Room
Void, Hull
Window
Window parts exist primarily to create windows between the inside and outside of a building or spacecraft. However, windows can also be used to join rooms and they can be used for decoration.
A transparency value is assigned to windows. Transparency may be set to invisible. Invisible windows are not useful for any purpose.
Windows glow in response to internal lighting conditions. Transparent windows should be grouped with the room that contains them, to be lit appropriately.
Transparency may be set to translucent. Translucent windows are decorative, glowing in response to simulated internal lighting conditions. This makes them useful to create a facade, suggesting interior rooms where none exist, by creating the appearance of many windows.
Translucent decorative windows may be grouped to cause them to be lit the same, as if they are all part of the same room.
Avoid situations where the player may see through several windows at the same time. This will often produce undesirable results.
A window jig can be used to make a window between an interior room and the outside of the hull. A window jig can also be used to make a window between two interior rooms.